How to Add Trust Badges to Shopify: A Step-by-Step Guide to Boosting Sales
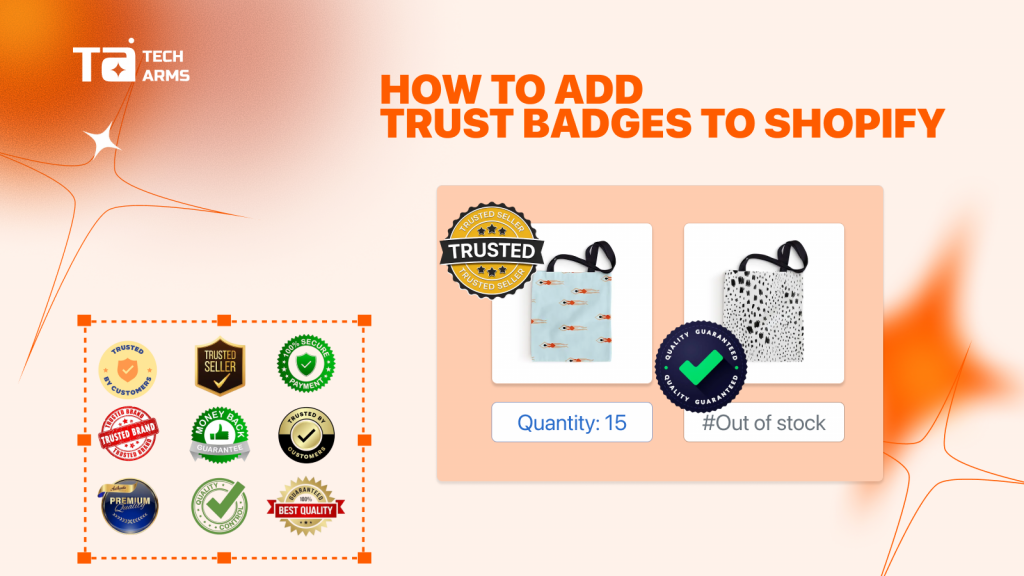
In the world of e-commerce, trust is currency. Your Shopify store might have the best products and competitive prices, but if customers don’t trust your site, they won’t complete their purchase. This is where trust badges become your secret weapon.
Trust badges are visual symbols, like SSL seals, payment method logos, or guarantee icons that instantly communicate security and legitimacy to your shoppers. Think of them as your store’s credentials, proving you’re a legitimate business worthy of their credit card information.
In this comprehensive guide, you’ll learn exactly how to add trust badges to Shopify using three different methods, discover which badges work best, and understand where to place them for maximum impact. Whether you’re a complete beginner or looking to optimize your existing setup, this guide has everything you need to build customer confidence and increase conversions.
Why Trust Badges are Essential
Remember the last time you chose a restaurant based on its Michelin stars or health department grade? Trust symbols in e-commerce work exactly the same way. Just as a Michelin star instantly signals quality and safety at a restaurant, trust badges provide immediate credibility assurance for your online store.
The data doesn’t lie. According to conversion rate optimization studies, displaying trust badges on checkout pages can generate a 42% higher conversion rate compared to pages without them. That’s nearly half again as many customers complete their purchases simply because they feel more secure.
Even more revealing: 19% of shoppers abandon their carts specifically because they don’t trust the website with their payment information. That’s one in five potential customers walking away, not because they don’t want your product, but because your site didn’t give them enough confidence to proceed.
Trust badges solve several critical problems for Shopify store owners:
Building Instant Credibility: Within seconds of landing on your product page, customers make snap judgments about your legitimacy. Security seals, payment logos, and third-party endorsements act as visual shortcuts that say “this business is verified and safe.”
Reducing Cart Abandonment: The checkout page is where anxiety peaks. Customers are about to hand over sensitive financial information. Displaying security badges and safe checkout seals at this crucial moment provides the final reassurance needed to click “complete order.”
Communicating Policies Clearly: Instead of burying shipping and return information in lengthy text blocks, visual badges like “Free Shipping” or “30-Day Returns” communicate your value propositions instantly and memorably.
Differentiating Your Store: In a crowded marketplace, trust badges help you stand out from competitors who might be cutting corners on security or customer service. They signal that you’re a professional operation worth doing business with.
The bottom line? Trust badges aren’t just decorative elements, they’re conversion optimization tools that directly impact your revenue. Now let’s explore how to add them to your Shopify store.
3 Fastest Ways to Add Trust Badges to Shopify
Adding trust badges to your Shopify store doesn’t require technical expertise or hiring a developer. Here are three proven methods, ranging from beginner-friendly to advanced placement control.
Method 1: Using the Shopify Theme Customizer (No Code Required)
This is the fastest and most accessible method for Shopify merchants of all skill levels. Your theme’s built-in customizer allows you to add visual elements without touching any code.
Step-by-Step Instructions:
- From your Shopify admin dashboard, navigate to Online Store > Themes
- Find your current theme and click the Customize button
- In the theme editor, scroll to the section where you want to add badges (typically the footer or product page)
- Click Add section or Add block depending on your theme
- Look for options like “Custom HTML”, “Icon with Text”, “Image with Text”, or “Collage”
- Upload your trust badge images or enter the image URLs
- Add alt text for accessibility (e.g., “Secure SSL encryption badge”)
- Arrange the badges in your preferred layout
- Click Save to publish your changes
Pro Tip: Use the theme customizer for universal badges that should appear site-wide, like “Free Shipping Over $50” or “Secure Payment Processing” in your footer. These build trust throughout the shopping journey, not just at checkout.
Best For: Store-wide trust messaging, footer badges, and non-product-specific credibility signals.
Method 2: Manually via Liquid Code (Precise Placement Control)
For merchants who want exact control over badge placement, such as directly above the “Add to Cart” button or in a specific location on the cart page – adding badges via Liquid code provides that precision.
Step-by-Step Instructions:
- First, upload your trust badge images:
- Go to Settings > Files in your Shopify admin
- Click Upload files and select your badge images
- After uploading, click on each image to copy its URL
- Save these URLs, you’ll need them in the code
- Navigate to your theme code editor:
- Go to Online Store > Themes
- Click the Actions dropdown for your active theme
- Select Edit code
- Locate the appropriate template file:
- For product pages: Find product.liquid or product-template.liquid in the Sections folder
- For cart pages: Find cart.liquid or cart-template.liquid
- For checkout (Shopify Plus only): Find checkout.liquid
- Find where you want to insert the badges. Look for familiar elements like the Add to Cart button <button> or price display
- Add this code snippet where you want the badges to appear:
<div class=”trust-badges” style=”margin: 20px 0; text-align: center;”>
<img src=”YOUR_BADGE_URL_1″ alt=”Secure Checkout” style=”width:80px; height:auto; margin: 0 10px;”/>
<img src=”YOUR_BADGE_URL_2″ alt=”SSL Encrypted” style=”width:80px; height:auto; margin: 0 10px;”/>
<img src=”YOUR_BADGE_URL_3″ alt=”Money Back Guarantee” style=”width:80px; height:auto; margin: 0 10px;”/>
</div>
- Replace YOUR_BADGE_URL_1, YOUR_BADGE_URL_2, etc., with the actual URLs you copied earlier
- Adjust the width value to make badges larger or smaller (80px is a good starting point)
- Click Save and preview your store to confirm the badges appear correctly
Pro Tip: Add trust badges immediately above or below your “Add to Cart” button on product pages. This is where purchase anxiety is highest, and a well-placed security badge can tip the decision in your favor.
Best For: Product-specific trust signals, cart page security messaging, and strategic placement near conversion points.
Method 3: Using Third-Party Apps (Scale and Automation)
For stores with large inventories or merchants who want advanced features like dynamic badge display, A/B testing, or product-specific labeling, Shopify apps provide the most powerful and flexible solution.
Why Use an App:
- No coding required but more powerful than theme customizer
- Dynamic badge assignment based on product tags, collections, or conditions
- Built-in design templates and customization options
- Easy to update badges site-wide instantly
- Many apps combine trust badges with product labels (“Best Seller,” “New Arrival,” etc.)
Recommended App: TA Product Labels & Badges
TA Product Labels & Badges goes beyond simple trust badges to offer comprehensive product highlighting. Here’s what makes it valuable:
- Dual Functionality: Display both trust badges (security, guarantees, shipping) and promotional labels (sale, new, trending) from one dashboard
- Smart Automation: Create rules to automatically display badges based on inventory levels, sale prices, product tags, or collections
- Visual Product Highlighting: Add eye-catching labels directly on product images to draw attention to your best offers
- Customizable Design: Match badges to your brand with customizable colors, fonts, shapes, and positioning
- Mobile Optimized: Badges automatically adjust for mobile shoppers without breaking your responsive design
How to Get Started:
- Visit the Shopify App Store
- Click Add app and follow the installation prompts
- Configure your trust badges and product labels from the app dashboard
- Set display rules (all products, specific collections, tagged items, etc.)
- Customize appearance to match your brand
- Activate and watch your conversion rates improve
Pro Tip: Apps like TA Product Labels & Badges feature AI-powered “Image-to-Layout” capabilities. Simply provide a URL or upload an image of a badge design you like, and the tool can automatically convert it into a properly formatted badge for your store. This eliminates hours of manual design work.
Best For: Stores with 50+ products, merchants wanting advanced customization, combining trust signals with promotional messaging, and those who want to test different badge strategies.
Advanced Trust-Building Strategies
While traditional trust badges are essential, forward-thinking Shopify merchants are taking credibility signaling to the next level with these advanced strategies.
The Power of Social Proof Integration
Trust badges work even better when combined with other credibility signals. Consider this layered approach:
Star Ratings + Trust Badges: Display your overall store rating alongside security badges. For example, a footer might show “4.8★ from 2,847 verified customers” next to SSL and payment badges. This combines transactional trust (security) with experiential trust (customer satisfaction).
Live Purchase Notifications: Apps that show “John from New York just purchased…” messages create urgency while demonstrating that real customers are actively buying. When paired with trust badges, this social proof becomes even more powerful.
Review Widgets on Product Pages: Instead of just showing a generic “Trusted Store” badge, display actual customer reviews near trust badges on product pages. This provides specific evidence that your security promises translate to positive shopping experiences.
Visual Product Highlighting
Trust isn’t just about payment security, it’s also about product quality and value. This is where combining trust badges with product labels creates a comprehensive credibility system.
Strategic Product Labeling: Use apps to add visual indicators directly on product images that highlight:
- “Best Seller” labels to leverage popularity bias
- “Eco-Friendly” or “Sustainably Sourced” to appeal to conscious consumers
- “Limited Stock” to create urgency
- “New Arrival” to showcase fresh inventory
- “Sale – 30% Off” to draw attention to promotions
These product-specific trust signals work in tandem with your security and payment badges. While security badges say “it’s safe to buy here,” product labels say “this specific item is worth buying.”
The Combined Effect: When a shopper sees a product labeled “Best Seller” with trust badges showing “Secure Checkout” and “30-Day Returns,” you’ve addressed multiple decision-making factors simultaneously: popularity (social proof), safety (security), and risk reduction (returns).
Design and Brand Consistency
Here’s a trust-badge mistake many stores make: they add too many badges in clashing styles, creating visual clutter that actually decreases credibility rather than building it.
Cohesive Visual Design: Ensure all product badges follow a consistent design language:
- Similar size ranges (avoid having some badges twice as large as others)
- Coordinated color schemes that match or complement your brand colors
- Consistent styling (all outlined badges, all filled badges, or a planned mix)
- Proper spacing between badges to avoid a “crowded” appearance
Quality Over Quantity: Three highly relevant, professionally designed badges are more effective than seven generic ones. Focus on the badges that matter most to your specific audience.
Mobile Consideration: Remember that 70%+ of Shopify traffic comes from mobile devices. Test how your badges appear on small screens. If they’re too small to read or too large and overwhelming, adjust accordingly.
Strategic Placement for Maximum Impact of Trust Badges
Even the most compelling trust badges won’t boost conversions if customers don’t see them. Here’s where to place badges for maximum psychological impact.
Above the Fold
Location: The portion of your webpage visible without scrolling, typically your homepage hero section or the top of product pages.
What to Place Here: Third-party endorsements, overall store ratings, and security certifications work best above the fold. These establish immediate credibility as soon as visitors land on your site.
Implementation: Use your homepage hero section or a banner bar immediately below the header to display badges like “4.8★ Rated by 5,000+ customers,” “A+ BBB Rating,” or “SSL Secured.”
Why It Works: First impressions form in milliseconds. Badges above the fold communicate trustworthiness before visitors even read your product descriptions or pricing.
Near Call-to-Action Buttons
Location: Immediately adjacent to “Add to Cart,” “Buy Now,” or “Checkout” buttons, typically within 1-2 inches of screen space.
What to Place Here: Payment method logos, security badges, and policy guarantees (“30-Day Returns,” “Price Match Promise”) work exceptionally well near CTAs.
Implementation: On product pages, create a small badge container directly above or below the “Add to Cart” button. Include 2-4 badges addressing common purchase objections.
Why It Works: This is the moment of maximum purchase anxiety. Your cursor is hovering over the button, but doubts creep in: “Is this site secure? Can I return this if it doesn’t work? Do they accept my credit card?” Badges positioned here answer these questions at the exact moment they arise.
Specific Example:
[Add to Cart Button]
[Secure Checkout | Free Returns | All Major Cards Accepted]
Cart and Checkout Pages
Location: On the cart page sidebar or summary, and throughout the checkout flow (especially near payment information fields).
What to Place Here: Focus exclusively on security and payment badges here. “SSL Encrypted,” “Secure Checkout,” payment logos, and “100% Safe Transaction” seals are crucial at this stage.
Implementation: Most themes allow badge placement in cart templates. For checkout customization, Shopify Plus merchants can edit checkout.liquid directly. Standard plan users should maximize cart page badge visibility since that’s the last fully customizable page before checkout.
Why It Works: At checkout, customers are entering sensitive financial data. Security concerns peak here. Well-placed security badges provide the final reassurance needed to complete the purchase rather than abandon the cart.
Shopify Plus Advantage: Plus merchants can add custom trust badges, security messaging, and guarantee copy directly to checkout pages – a powerful conversion tool unavailable to standard plans. If you’re seeing high cart abandonment, this capability alone might justify upgrading to Shopify Plus.
Footer
Location: Your website footer, visible on every page across your store.
What to Place Here: A comprehensive badge collection including security seals, payment logos, shipping information, and third-party certifications. This is where you can display more badges than would fit cleanly on product pages.
Implementation: Use your theme customizer to add a footer section specifically for trust badges. Organize them logically: payment methods together, security badges together, policy badges together.
Why It Works: The footer provides passive credibility reinforcement. Visitors who scroll to the bottom of pages – often to find contact information or policy links – receive additional trust signals without the badges cluttering your primary content areas.
FAQ
Several resources offer free, professionally designed trust badges:
Canva: Create custom badges using free templates or design your own from scratch. Canva offers thousands of icons and design elements suitable for trust badges.
Freepik: Download free badge graphics, security seal icons, and guarantee badges. The free tier has usage restrictions, but the Pro tier (around $10/month) offers unlimited downloads.
Your Service Providers: Payment processors (Stripe, PayPal, Square) and SSL certificate providers (Let’s Encrypt, DigiCert) typically offer official badge images you can download and use freely.
Shopify App Store: Many free apps include basic trust badge functionality. Search “trust badges” or “trust seals” in the app store to find options with free plans.
Important Note: While you can use generic “secure checkout” or “money back guarantee” badges freely, never display official security seal badges (Norton, McAfee, BBB) unless you actually have those certifications. Fraudulent use of verification badges can result in legal action and destroy customer trust if discovered.
This depends on your Shopify plan:
Shopify Plus: Yes, Plus merchants have full checkout page customization capabilities. You can edit the checkout.liquid file to add custom HTML, images, and trust badges exactly where you want them throughout the checkout flow.
Standard Shopify Plans: Direct checkout page customization is not available. However, you can maximize trust badge visibility on the cart page (the last page you can customize before checkout). This still provides crucial reassurance before customers enter the checkout flow.
Workaround for Standard Plans: Focus on the cart page. Add prominent security badges, payment logos, and guarantee messaging here. Since this is the last step customers see before checkout, well-placed badges still effectively reduce checkout abandonment.
Additional Tip: Ensure your checkout page shows Shopify’s built-in security indicators (padlock icon, “https://” in the URL). You can also customize basic checkout elements like colors and logos through Settings > Checkout without needing Plus.
There’s a balance between building credibility and creating clutter. Here are guidelines:
Product Pages: 3-5 badges maximum near the “Add to Cart” button. Focus on the most relevant badges for that specific buying decision (security, payments, returns, guarantees).
Cart/Checkout Pages: 4-6 security and payment badges. These pages should emphasize transaction safety above all else.
Homepage/Footer: 6-10 badges are acceptable since there’s more visual space and these areas aren’t competing with product content for attention.
The Quality Over Quantity Rule: One highly relevant badge (like a verified 4.8-star rating with thousands of reviews) is more powerful than five generic badges.
Visual Test: If your badge section looks cluttered, overwhelming, or makes your page feel “busy,” you have too many. The badges should enhance your design, not detract from it.
A/B Testing Recommendation: Try displaying different badge combinations to different visitor segments and measure which setup produces higher conversion rates. Often, fewer but more strategic badges outperform
larger badge collections.
Final Thought
Adding trust badges isn’t a one-and-done task. The most successful merchants continuously test and refine their approach. Use A/B testing to compare different badge types and placements – does “Secure Checkout” or “Money Back Guarantee” perform better near your CTA? Track your cart abandonment rate and conversion metrics before and after implementing badges to measure real impact.
Remember: trust badges aren’t decoration. They remove friction from the buying process by answering critical customer questions at the exact moment doubt creeps in. When strategically placed, these simple visual elements transform your Shopify store from just another website into a credible business customers feel confident purchasing from.
Ready to Boost Your Shopify Conversions?
Adding trust badges is your first step toward building the customer confidence that drives sales. But why stop at basic security seals?
Take your product presentation to the next level with TA Product Labels & Badges. This powerful app combines trust building with smart product highlighting, allowing you to:
✅ Display security badges and promotional labels from one easy dashboard
✅ Automatically highlight best sellers, new arrivals, and sale items
✅ Create custom badges that match your brand perfectly
✅ Use AI-powered design tools to convert images into badges instantly
✅ Boost conversions with strategic visual merchandising
Install TA Product Labels & Badges today and turn browsers into buyers with trust signals that sell.


Hi, I’m Vu Cam Chi – a detail-driven digital marketer focused on building practical growth solutions for ecommerce and digital products. I combine data, user behavior, and clear messaging to turn ideas into results. Strategy guides my decisions, and optimization is part of my daily work. I care deeply about creating experiences that make sense for users and actually perform.