3 Simple Ways How to Add Product Labels & Badges on Shopify Store
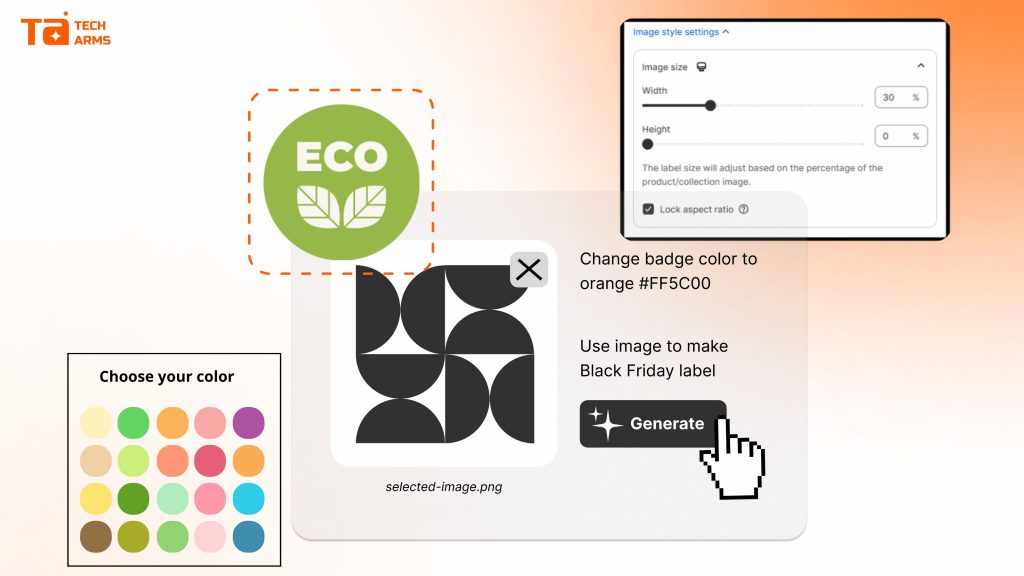
Looking at your Shopify store, you might wonder why some products fly off the virtual shelves while others gather digital dust. The secret often lies in those small but mighty visual cues: product labels and badges.
Whether you’re showcasing a “Best Seller,” highlighting a “Limited Stock” item, or promoting a “Sale,” product labels help shoppers make faster purchasing decisions. In fact, with customer attention spans dropping below 10 seconds, these visual markers aren’t just nice to have – they’re essential for capturing attention and driving conversions.
In this guide, you’ll discover exactly how to add product labels in Shopify using three different methods, from no-code app solutions to custom coding. We’ll also share the top apps that make implementation effortless, along with actionable tips to maximize your label strategy.
Let’s dive in and transform your product pages into conversion machines.
What Are Product Labels & Badges, and Why Do You Need Them?
Product labels and product badges are small, visual additions placed on product images or listings to highlight specific information. Think of them as digital shelf talkers that guide your customers’ attention exactly where you want it.
These visual cues can be customized in countless ways – different colors, shapes, sizes, and text – to match your store’s branding while delivering important product information at a glance.
Strategic placement makes all the difference. The most effective positions include:
- Directly on product images (typically top-left or top-right corners)
- Below the product title
- Next to the price
- Above the “Add to Cart” button
The key is visibility. Your labels should be prominent enough that shoppers can’t miss them, but not so overwhelming that they distract from the product itself.

How to Add Product Labels & Badges on Shopify in 3 simple ways
Now that you understand the “why,” let’s explore the “how.” There are three main approaches to adding product labels in Shopify, each with distinct advantages depending on your technical skills, budget, and customization needs.
Method 1: Using a Specialized Shopify App
For most Shopify merchants, using a dedicated app is the smartest choice. This approach offers the perfect balance of ease, functionality, and affordability.
Why Apps Are the Best Choice for Most Stores:
- No coding required. If you can click buttons and type text, you can create professional product labels.
- Apps provide user-friendly interfaces with pre-designed templates that look professional right out of the box. Many offer drag-and-drop editors that make customization as simple as designing a social media post.
- You can set conditions to automatically apply labels to specific products, collections, or tags. For example, automatically label all discounted products as “Sale” or tag low-inventory items with “Almost Gone.” Once set up, the system runs itself.
Pros of Using Apps:
- Perfect for beginners with zero technical knowledge
- Affordable pricing plans (many have free tiers)
- Quick implementation, often live within minutes
- Regular updates and customer support
- No risk of breaking your theme with code errors
Cons to Consider:
- Less deeply customizable than hand-coded solutions
- May involve recurring monthly fees
- Slight dependency on the app developer for feature updates
Getting Started with Apps:
The process is remarkably simple:
- Browse the Shopify App Store for “product labels” or “product badges”
- Install your chosen app (we’ll recommend the best ones shortly)
- Select from pre-designed templates or create custom labels
- Set your display conditions (which products, collections, or tags)
- Customize colors, text, and positioning
- Activate and watch your labels go live
⚡️ Highlight your products and boost sales instantly with the TA Product Labels & Badges app
Method 2: Manually Edit the Shopify Theme Code
For merchants with technical skills or those wanting maximum customization without recurring costs, coding your own labels is a viable option.
What You Need to Know:
This is the cheapest long-term option since there are no monthly app fees. It also offers the highest level of customization, you control every pixel and behavior.
However, this method requires basic knowledge of HTML, CSS, and Liquid (Shopify’s templating language). If these terms sound foreign, you’ll want to stick with Method 1 or consider Method 3.
The Step-by-Step Process:
1. Access your theme code by navigating to Shopify Admin > Online Store > Themes > Actions > Edit code. Back up your theme first (this is crucial).
2. Locate the relevant template files. You’ll typically work with files like product-template.liquid, product.liquid, or main-product.liquid, depending on your theme structure.
3. Insert your code in two parts:
HTML/CSS for the visual appearance:
<div>SALE</div>
Liquid code for conditional display:
{% if product.tags contains ‘on-sale’ %}
<div>SALE</div>
{% endif %}
Important Risks to Consider:
This method is time-consuming and laborious, especially if you’re not comfortable with code. There’s a real risk of errors that could break your website’s display or functionality.
Additionally, your customizations may be overwritten when you update your theme, requiring you to re-implement them. This ongoing maintenance can become tedious.
Who Should Choose This Method:
Developers and technically proficient merchants who want complete control and have no budget for apps. It’s also ideal for stores with unique branding requirements that pre-built apps can’t accommodate.
Method 3: Hire a Professional Developer or Shopify Expert
If you want custom functionality but lack coding expertise (or time), hiring a professional is the perfect middle ground. Shopify Experts are vetted developers who specialize in Shopify customization. They can create custom badges that work exactly as you envision, integrated seamlessly with your theme.
Pros of Professional Development:
You get professional, polished results without lifting a finger. Your labels will be perfectly optimized for your theme and mobile-responsive. Plus, you save significant time and avoid the learning curve.
Cons to Consider:
Professional development is expensive, typically ranging from $500 to $2,000+ depending on complexity. You’ll also need ongoing coordination with the developer for future modifications or updates.
When This Makes Sense:
Choose this method if you’re running a high-volume store where professional appearance directly impacts revenue, need highly specific functionality that apps don’t offer, or have budget for development but no time to learn coding.
You can find Shopify Experts at experts.shopify.com, where you can review portfolios, read client reviews, and request quotes.
Advanced Techniques and Actionable Insights for Label & Badges Management
Once you’ve chosen your implementation method, these advanced strategies will help you get maximum impact from your product labels.
Using Product Tags as Conditions
Product tags are your secret weapon for label automation. By applying specific tags in your Shopify Admin (like “staff-pick,” “bestseller,” or “limited-edition”), you create triggers that apps or custom code can use to display appropriate badges.
This approach keeps your label management centralized, just add or remove tags in one place, and your labels automatically update across your store.
Automation and Scheduling
Time-based label displays are incredibly powerful for seasonal promotions. Modern apps would help in this case as they allow you to schedule label visibility for specific periods or events.
Imagine automatically displaying “Black Friday Deal” labels from November 24-27, then seamlessly switching to “Holiday Gift” badges through December, all without manual intervention. This scheduling capability saves tremendous time and ensures you never miss promotional opportunities.
Managing Built-In Status Labels
Shopify includes some built-in status functionality you can leverage such as:
Adding a Sales Badge: When you enter a “Compare at price” that’s higher than your actual selling price in the Shopify admin product page, many themes automatically display a sale badge or show the discount percentage. In this way, no app or coding is required.
Adding a Sold-Out Label: Set product quantity to 0 and uncheck “Continue selling when out of stock” under inventory settings. This triggers built-in sold-out indicators in most themes. This creates authentic scarcity (though use it honestly because false scarcity can damage trust).
Targeted Displays for Different Customer Segments
Advanced merchants can display different labels to different customer segments to meet their specific needs. For instance, you can show “VIP Exclusive” labels only to logged-in wholesale customers, or display country-specific messages like “Free Shipping in US” only to American visitors.
This segmentation, available in premium apps, creates personalized shopping experiences that boost conversions.
Top Shopify Product Label & Badge Apps Comparison
Let’s examine the best apps for adding product labels to your Shopify store, each offering unique advantages that help you on their own ways, the table below would help you compare them so you can choose which is best work for your store.
| Description | Pricing | Best for | |
| TA Product Labels & Badges | Offers a large collection of pre-designed templates perfect for BFCM, holidays, and sales events. Its standout feature is variant-specific labels—display different badges for different product variants (colors, sizes, etc.). You can set display conditions based on stock levels, discount ranges, or even customer country, making it highly flexible. | Paid plans start at $9/month for expanded limits. | Stores needing comprehensive condition settings and variant-level control. |
| DECO Product Labels & Badges | Sami provides a massive assortment of pre-designed options with flexible display conditions based on tags, collections, and price. It includes multilingual support for international stores. | Free plan includes 4 labels/badges for 20 items with unlimited banners. Paid plans start at $9/month. | Stores wanting free design templates with automation flexibility at affordable prices. |
| Sami Product Labels & Badges | Sami provides a massive assortment of pre-designed options with flexible display conditions based on tags, collections, and price. It includes multilingual support for international stores. | Paid plans start at $9.9/month | Budget-conscious merchants who want unlimited functionality without monthly fees. |
| Fordeer: Product Labels & Badges | Fordeer’s extensive library focuses on automated promotion campaigns. Display labels based on discount/price ranges, product creation dates, or stock status. It excels at targeted displays for different customer segments. | Free plan available. Paid plans start at $4.99/month. | Marketing-focused stores running multiple automated promotional campaigns. |
| Flair Product Badges | Flair specializes in targeted, automated badges like “In Stock,” “Low Stock,” and “Staff Picks.” It includes banners with countdown timers and focuses heavily on scarcity and urgency tactics. | Plans start at $29/month with a 14-day free trial. | High-volume stores maximizing conversions through urgency and sophisticated scheduling tools. |
Making Your Shopify Store Convert
Product labels and badges represent a fundamental eCommerce merchandising strategy. They instantly communicate crucial product details, amplify promotional efforts, and guide customers toward purchasing decisions – all without requiring them to read lengthy descriptions.
The beauty of this strategy is its simplicity. Small visual cues create significant psychological impacts, triggering urgency, social proof, and value perception that directly influence buying behavior.
By implementing product labels strategically, you’re not just decorating your store – you’re optimizing the customer journey. You’re respecting your visitors’ limited attention spans by delivering information visually and immediately.

Your Next Steps
Begin by auditing your current product catalog. Which products would benefit most from labels? Your bestsellers need social proof badges. Your seasonal items need urgency indicators. Your discounted products need promotional labels.
Then, based on your technical comfort level and budget:
- Non-technical merchants: Install a label app today (start with Sami for free unlimited features)
- Technical merchants: Begin experimenting with custom code on a duplicate theme
- Busy merchants with budget: Request quotes from Shopify Experts for professional implementation
Start small, test different label types and placements, and watch your conversion rates climb. Your products deserve to be noticed, and labels and badges ensure they will be.
FAQs
Can I schedule product labels for specific dates or promotions?Yes, many product label apps offer scheduling features that let you automatically display labels during specific time periods. This is perfect for Black Friday sales, holiday promotions, or limited-time events. You can set labels to appear and disappear automatically without manual intervention, ensuring your promotional messaging is always timely and relevant.
Can I add product labels without an app?Yes, you can add product labels without an app by manually editing your Shopify theme code. This requires accessing your theme files through Shopify Admin > Online Store > Themes > Edit code, then inserting HTML/CSS for the label design and Liquid code for display conditions. However, this method requires coding knowledge and carries the risk of breaking your theme if not done correctly.
Can I customize product labels to match my brand?Absolutely. Most product label apps offer extensive customization options including colors, fonts, shapes, sizes, and text. You can create labels that perfectly align with your brand identity. Apps typically provide pre-designed templates as starting points, which you can then modify to match your store’s aesthetic.
Conclusion
Knowing how to add product labels and badges on Shopify store is crucial, it isn’t just about making your products look prettier, it’s about communicating value, creating urgency, and guiding customers toward confident purchasing decisions in a matter of seconds.
Throughout this guide, you’ve learned three distinct methods on how to add product labels & badges on Shopify. Each approach has its place depending on your technical skills, budget, and specific requirements. Your next step is simple: choose your implementation method and get started today. Install an app, experiment with code, or reach out to a developer. Every day without strategic product labels ỏ badges is a day of missed conversions and lost revenue.
The tools are in your hands. The strategies are proven. Now it’s time to put them to work and watch your Shopify store convert like never before.

Hi, I’m Vu Cam Chi – a detail-driven digital marketer focused on building practical growth solutions for ecommerce and digital products. I combine data, user behavior, and clear messaging to turn ideas into results. Strategy guides my decisions, and optimization is part of my daily work. I care deeply about creating experiences that make sense for users and actually perform.